Monday, December 16, 2013

HOME FOR THE HOLIDAYS WITH RUBBERMOON

RUBBERMOON HOLIDAY HOUSE
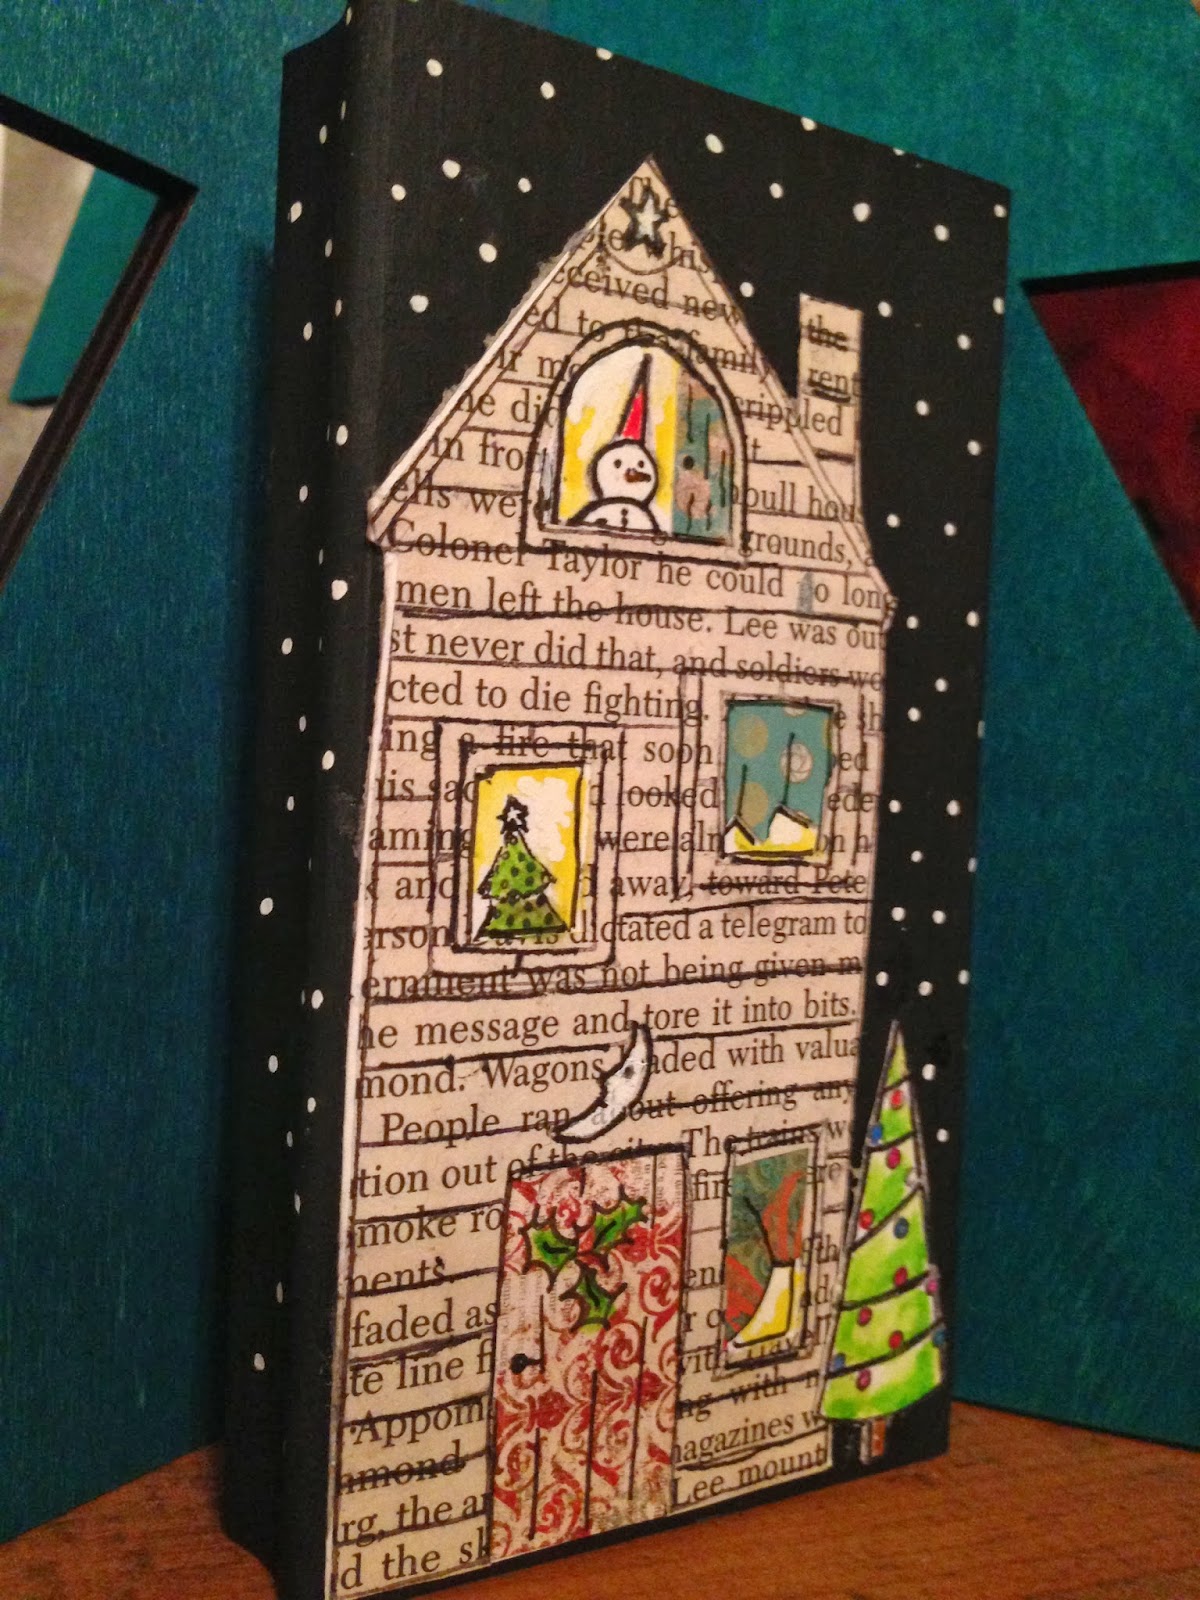
My final post for the Holiday Season is one that I absolutely LOVED creating. Anytime I am able to use Old Text in one of my projects, it makes me Smile! The Little Party Hat Snowman Rubbermoon Stamp is one of my very FAVORITES, and I will list him below along with the other 3 stamps I used for this little Winter Sample.
                                    (1) Party Hat Snowman
                                    (2) Moon Unit (house) db4040m
                                    (3) Tree With Lights db2590e
                                    (4)  Small Xmas Tree mk363c

I applied the large Moon Unit House stamp onto Text from an Old Book, then cut out with Scissors including the Door and Windows. Cool Journal Paper was used as the Door and Window Coverings to add Personality to the Holiday House. Even though I used these particular Christmas/Winter Stamps in the Window and on the side of the House..... You can use any Number of different Stamps to create your own theme throughout the year. After applying the Stamps, I added color with Derwent Intense Pencils. Drawing Holly onto the Door added a festive element. After glueing the Holiday House and the Tree With Lights Stamp to the Gesso Covered Wooden Block,  I used a White Water Based Sharpie Marker to make tiny stars in the sky. I hope you enjoy this fun project.
                                WISHING YOU A MOST MAGICAL
                                           HOLIDAY!!!!
                
                                       Till Next Time- BARB

Monday, November 25, 2013

VINTAGE ORNAMENTS ON WOODEN BLOCK

Vintage Ornaments on Wooden Block


I have always Loved the look of  Vintage Shiny Brite Christmas Ornaments. When these very fun Rubbermoon Stamps caught my eye,  I just HAD to Own them! I made a Cheery Holiday sample on a Wooden Block, that can be displayed anywhere in your home. It is very easy to create with just a few supplies and simple steps.
Supplies Needed for Project

Below is the list of Supplies Needed for this Project
1) Set of 5 Old Fashioned Rubbermoon Ornament Stamps (I used only 3 for the above project)
2) Small Wooden Block
3) Black Gesso
4) Derwent Inktense Color Pencils
5) Black Photo Corners
6) One Small Sheet of Water Color Paper
7) Decorative Scrap Book Paper
8) Faber-Castell Artist Pen-S
Prepared Wooden Block

Above is a Photo of the prepared Wooden Block.  Gesso all sides of the plain wooden block with Black Gesso. It is best to give at least 2 coats for maximin coverage.  Next, cut out a piece of Holiday Themed or Festive Scrap Book Paper just a tiny bit smaller than the wooden block in size.  Paste Paper to the Block with PVA Adhesive. For the Second Layer, attach a piece of Water Color paper even yet smaller than Decorative paper with the Black Photo Corners. 
Create Your Own Holiday Block

Next, stamp your choice of the Old Fashioned Rubbermoon  Ornaments onto the Water Color Paper. I also used "Joy to the World" rm2278b stamp on the lower right hand corner of the piece. The third stamp used is one of my Very Favorites! It is the Itty Bitty Red Heart Stamp. I placed it above each of the ornaments as shown in the photo below.
Finished Holiday Project

After I used my stamps, I took "artistic license"  by drawing some Holly onto the paper using the Faber-Castell Artist pen.  After Stamping and Drawing, use Derwert Inktense Color Pencil to add Bright Color! I hope you  have a chance to try this project on your own. Have the Happiest of Holiday Seasons!
Till Next Time-  BARB

Monday, November 11, 2013

Transforming A Necklace with a Rubbermoon Stamp

I purchased this pretty cool Frida Necklace at a gift store while visiting Whidbey Island this past September. When I arrived home with it, I felt the larger flat piece needed some sort of Design Element. So I then decided to grab a Rubbermoon Stamp and tore some text from an old book. I vertically pasted the old text onto the long piece. Using the "Mod Marks Dark kp5098c" stamp from The KRE 8 TIV ELEMENTS/ Mid Century Modern Designs,  I applied it over the old text. For the last step, I used Acrylic Paint to "Antique" the edges of the paper for a more "Vintage" look. This is how the necklace looks now....
Transformed Frida Necklace
The Moral of this Blog, is that there are so many fun options for using Rubbermoon Stamps than just merely the Traditional!
Till Next Time- Barb

Thursday, October 17, 2013

FIRST EVER RUBBERMOON STAMPS CREATIVE TEAM!!!!!

    DRUM ROLL!!! I am "Over the Moon" excited to be a part of the very first CREATIVE DESIGN TEAM for RUBBERMOON STAMPS! For the next several months, the rest of the Amazing Team and I will be Blogging and Posting on Facebook with our new ideas for all the wonderful ways that ANYONE can incorporate Rubbermoon Stamps into their creative life. 
    For a fun beginning, I am posting a card I created for my niece and her husband when they purchased their first home....

After some guidance from Rubbermoon Stamps owner, Kristen Powers, http://www.rubbermoon.com/ I was able to make this cool card myself. So... you can too! There are actually SEVEN stamps incorporated into this card. I will list them for you....
                                                                                  
1)Spread the Love (bird w/heart)... Kp5007c

2) Moon Unit (house)... db4040m

3)Seven Daisys... db2421h

4)New Home Words... Kp5017f

5)Itty Heart...mk169a

6)Wild Bunch (mushrooms) ...Kp5030b

7)Teeny Bird ....5080a


With these very FUN stamps you can make a card for someone special and will mean so much to them. By using these Seven Rubbermoon Stamps, cool paper, pages from an old book, markers, paint etc.... I was able to make a "one of a kind" card. I had a blast creating it too!

TILL NEXT TIME! -BARB


Monday, October 14, 2013

Monday, February 6, 2012

Polaroid Manipulations

Some of my favorite Polaroid Manipulations, I created several years back. This is sort of a lost art, due to the lack of "old school" polaroid film. Such a wonderful medium.

Friday, February 3, 2012

NEW JOURNAL PROJECT ON ITS WAY TO NORWAY(:

Just finished a journal for a Norwegian friend of mine that I met through Life Book Class. Wanted to post a photo of the sewn pages before the leather cover is attached. This journal will travel from Missouri to my friend, Gro in Norway. Gro will pack it with her for a journey this winter to Thailand. It will be filled with all sorts of images, art and memories from her trip. Journals make me smile.(: